
I love necklaces. The perfect necklace can make an outfit go from “eh” to “ahhh.” But if you’re anything like me, when you get home and make a beeline for those yoga pants and t-shirt (and by that I actually mean rushing to take off that uncomfortable bra – you know it’s true!), your necklaces end up in a pile on your dresser.
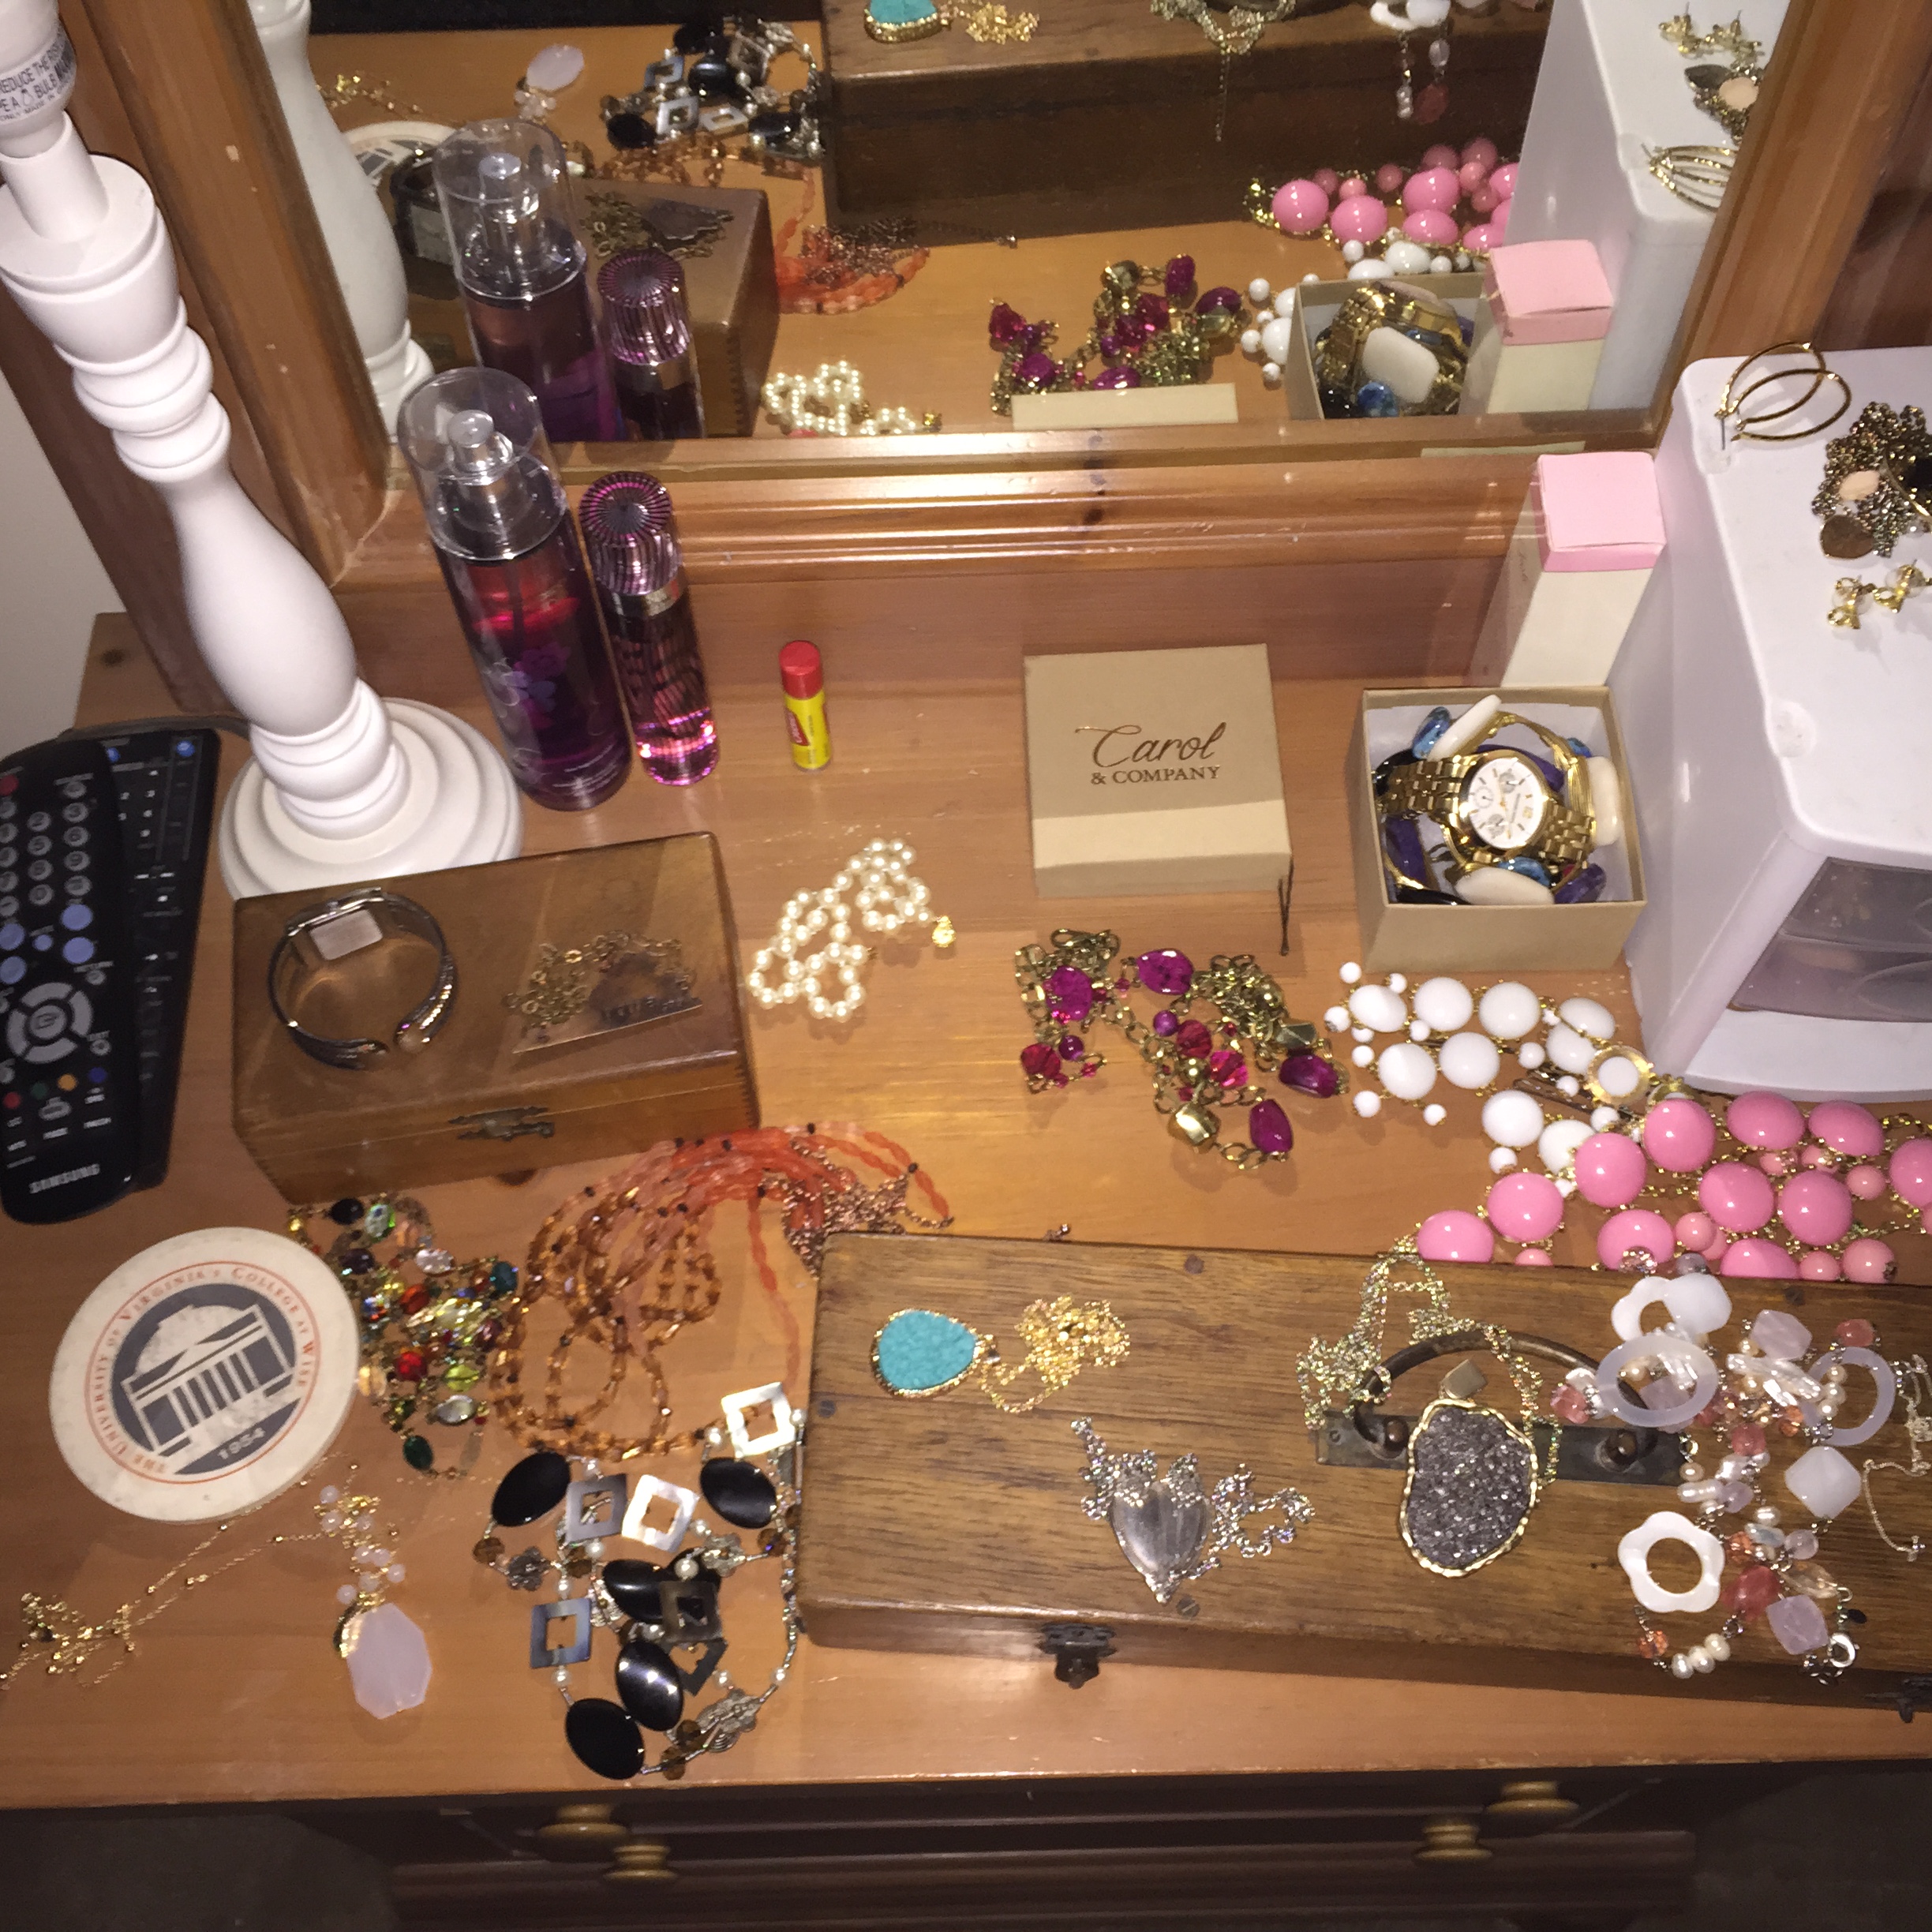
This is bad. Do not be like this girl (me).
Etsy has a ton of necklace holder options that are really adorable, but I wanted something simple that I could tailor to my own tastes and needs…and wallet. Overall, I spent $33 on supplies, and that includes a hand saw for ~$15 which will come in handy (<–see what I did there?) for other projects.
Here’s what you’ll need:
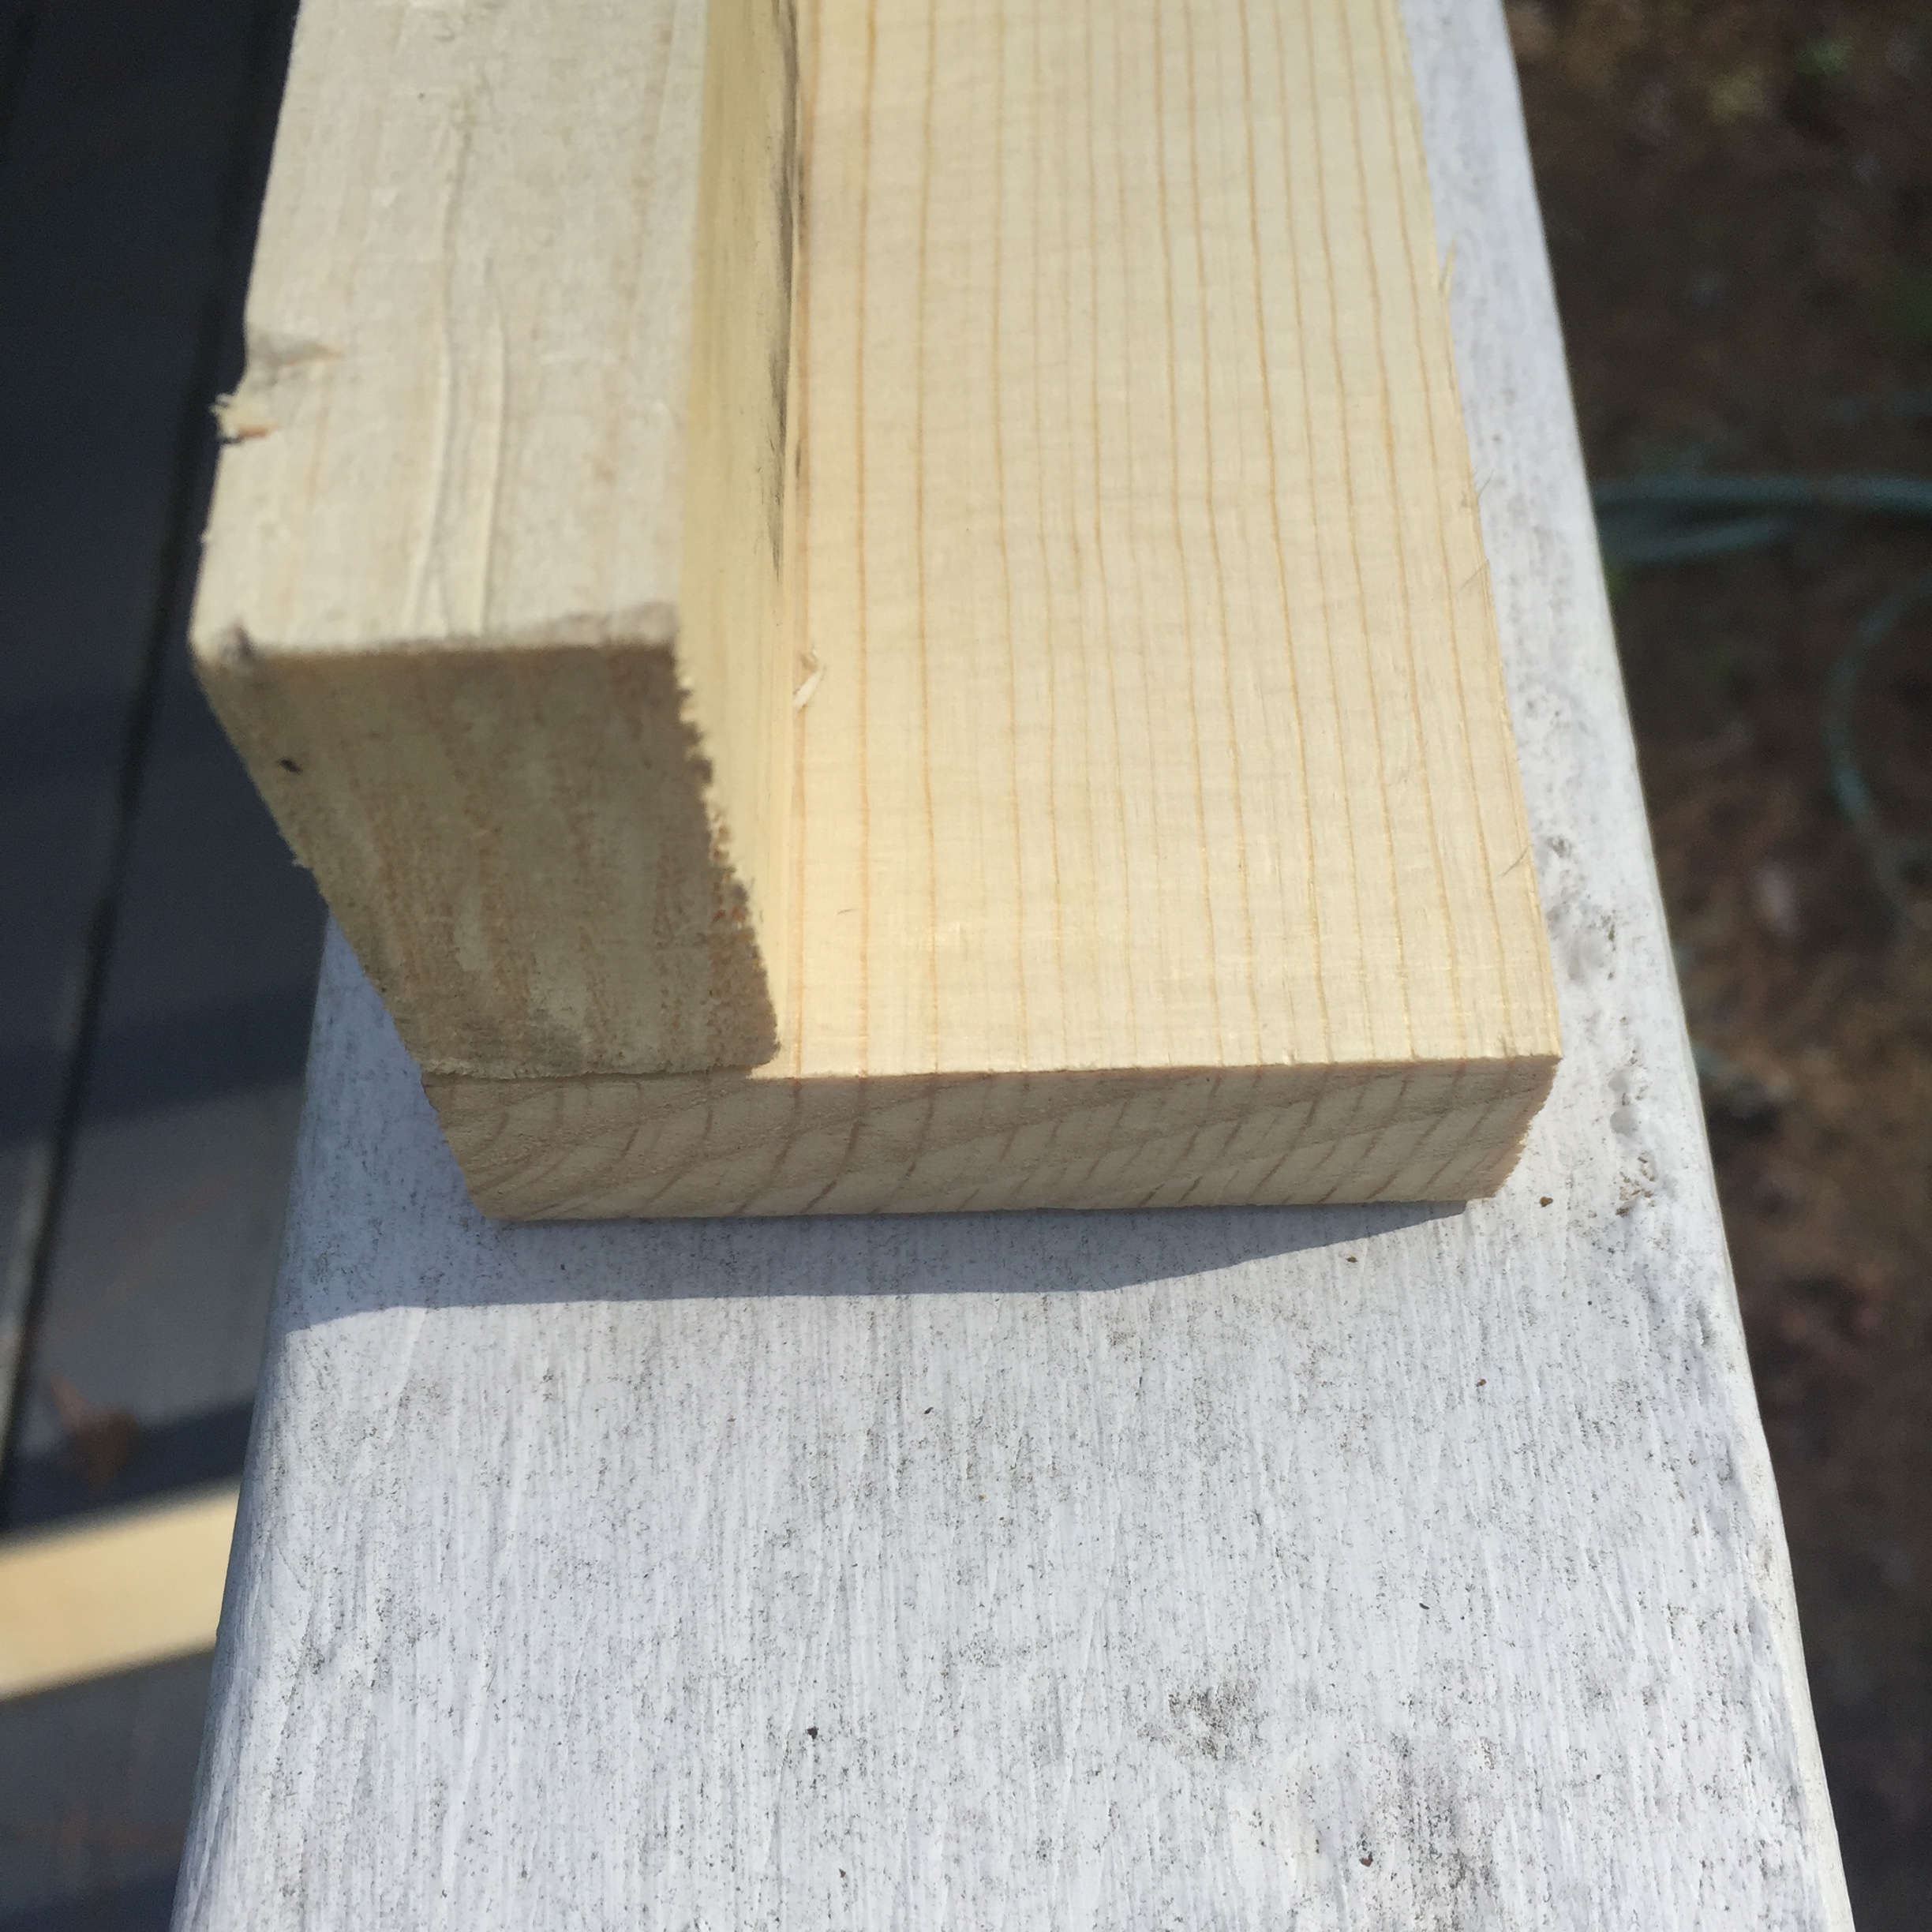
1 piece of whitewood board 1″ x 3″ x 6′
1 piece of whitewood board 1″ x 2″ x 6′
1 package of 7/8″ cup hooks (mine has 50 gold hooks)
1 package of small picture hangers (mine has 6 hangers)
1 box of 1 1/2″ finish nails (I bought a 1lb box)
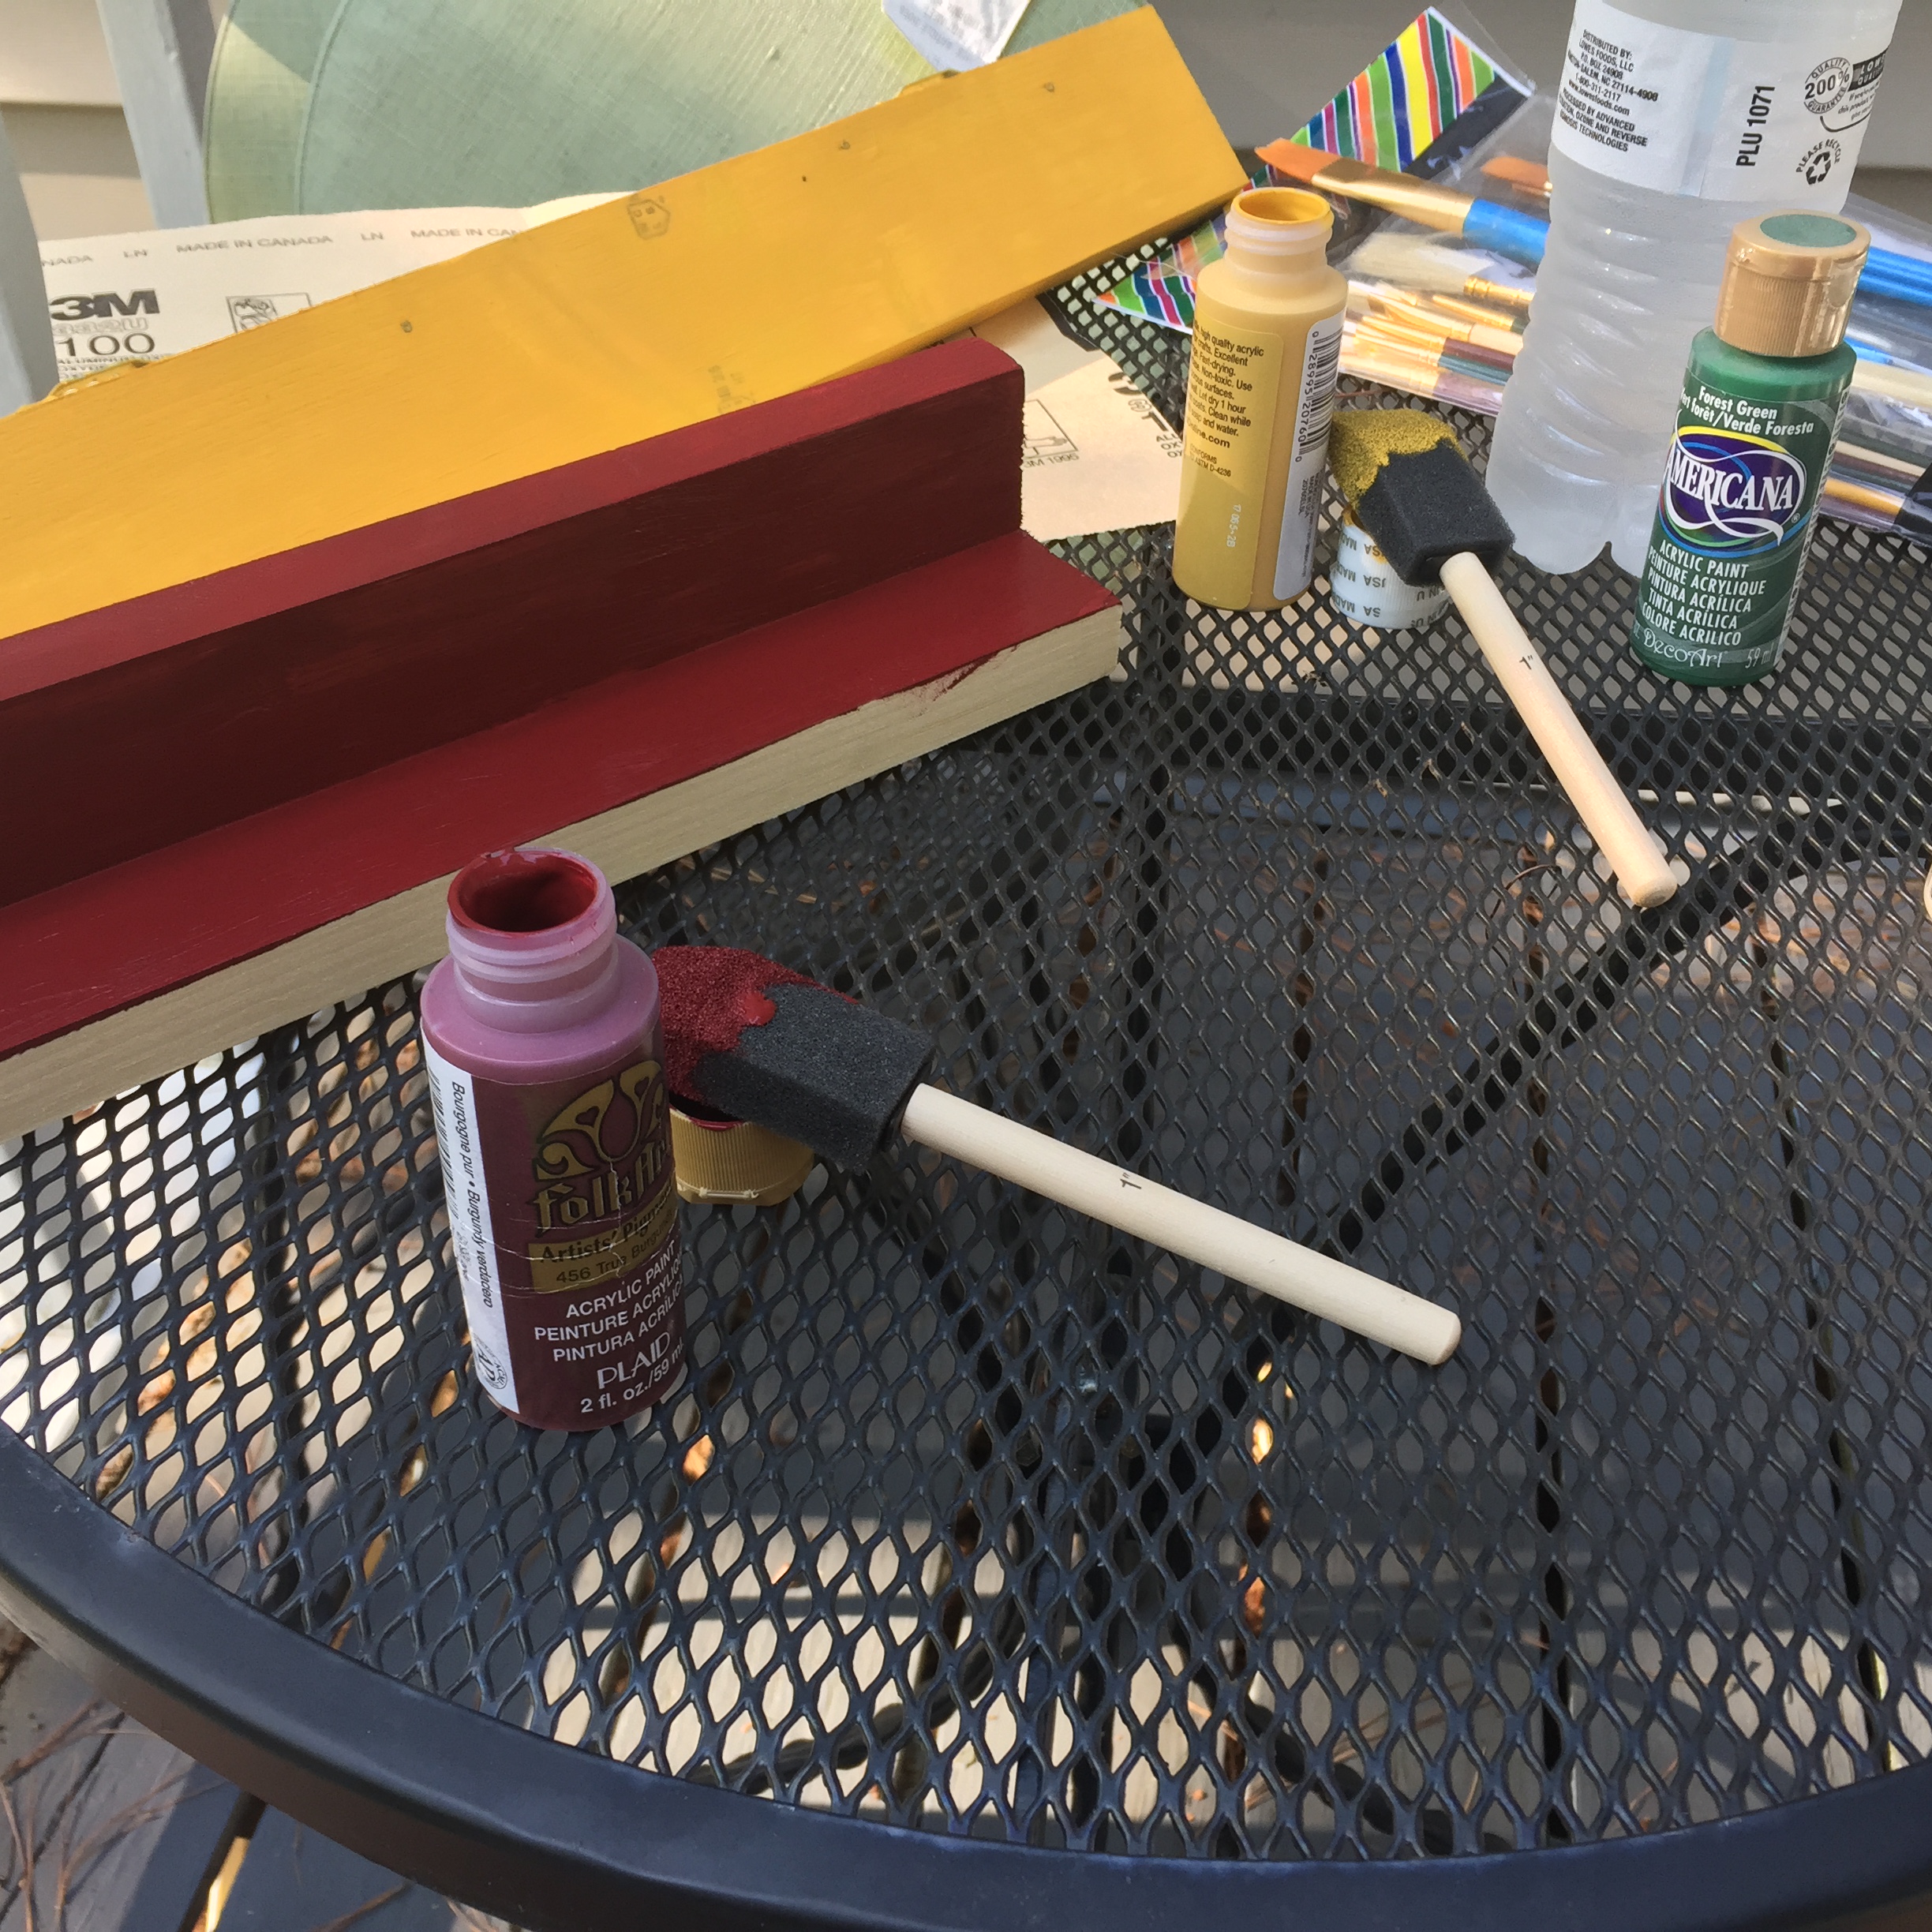
A hammer, saw (I just used a hand saw), tape measure, pencil, sandpaper, and sponge brushes (I used acrylic paint).
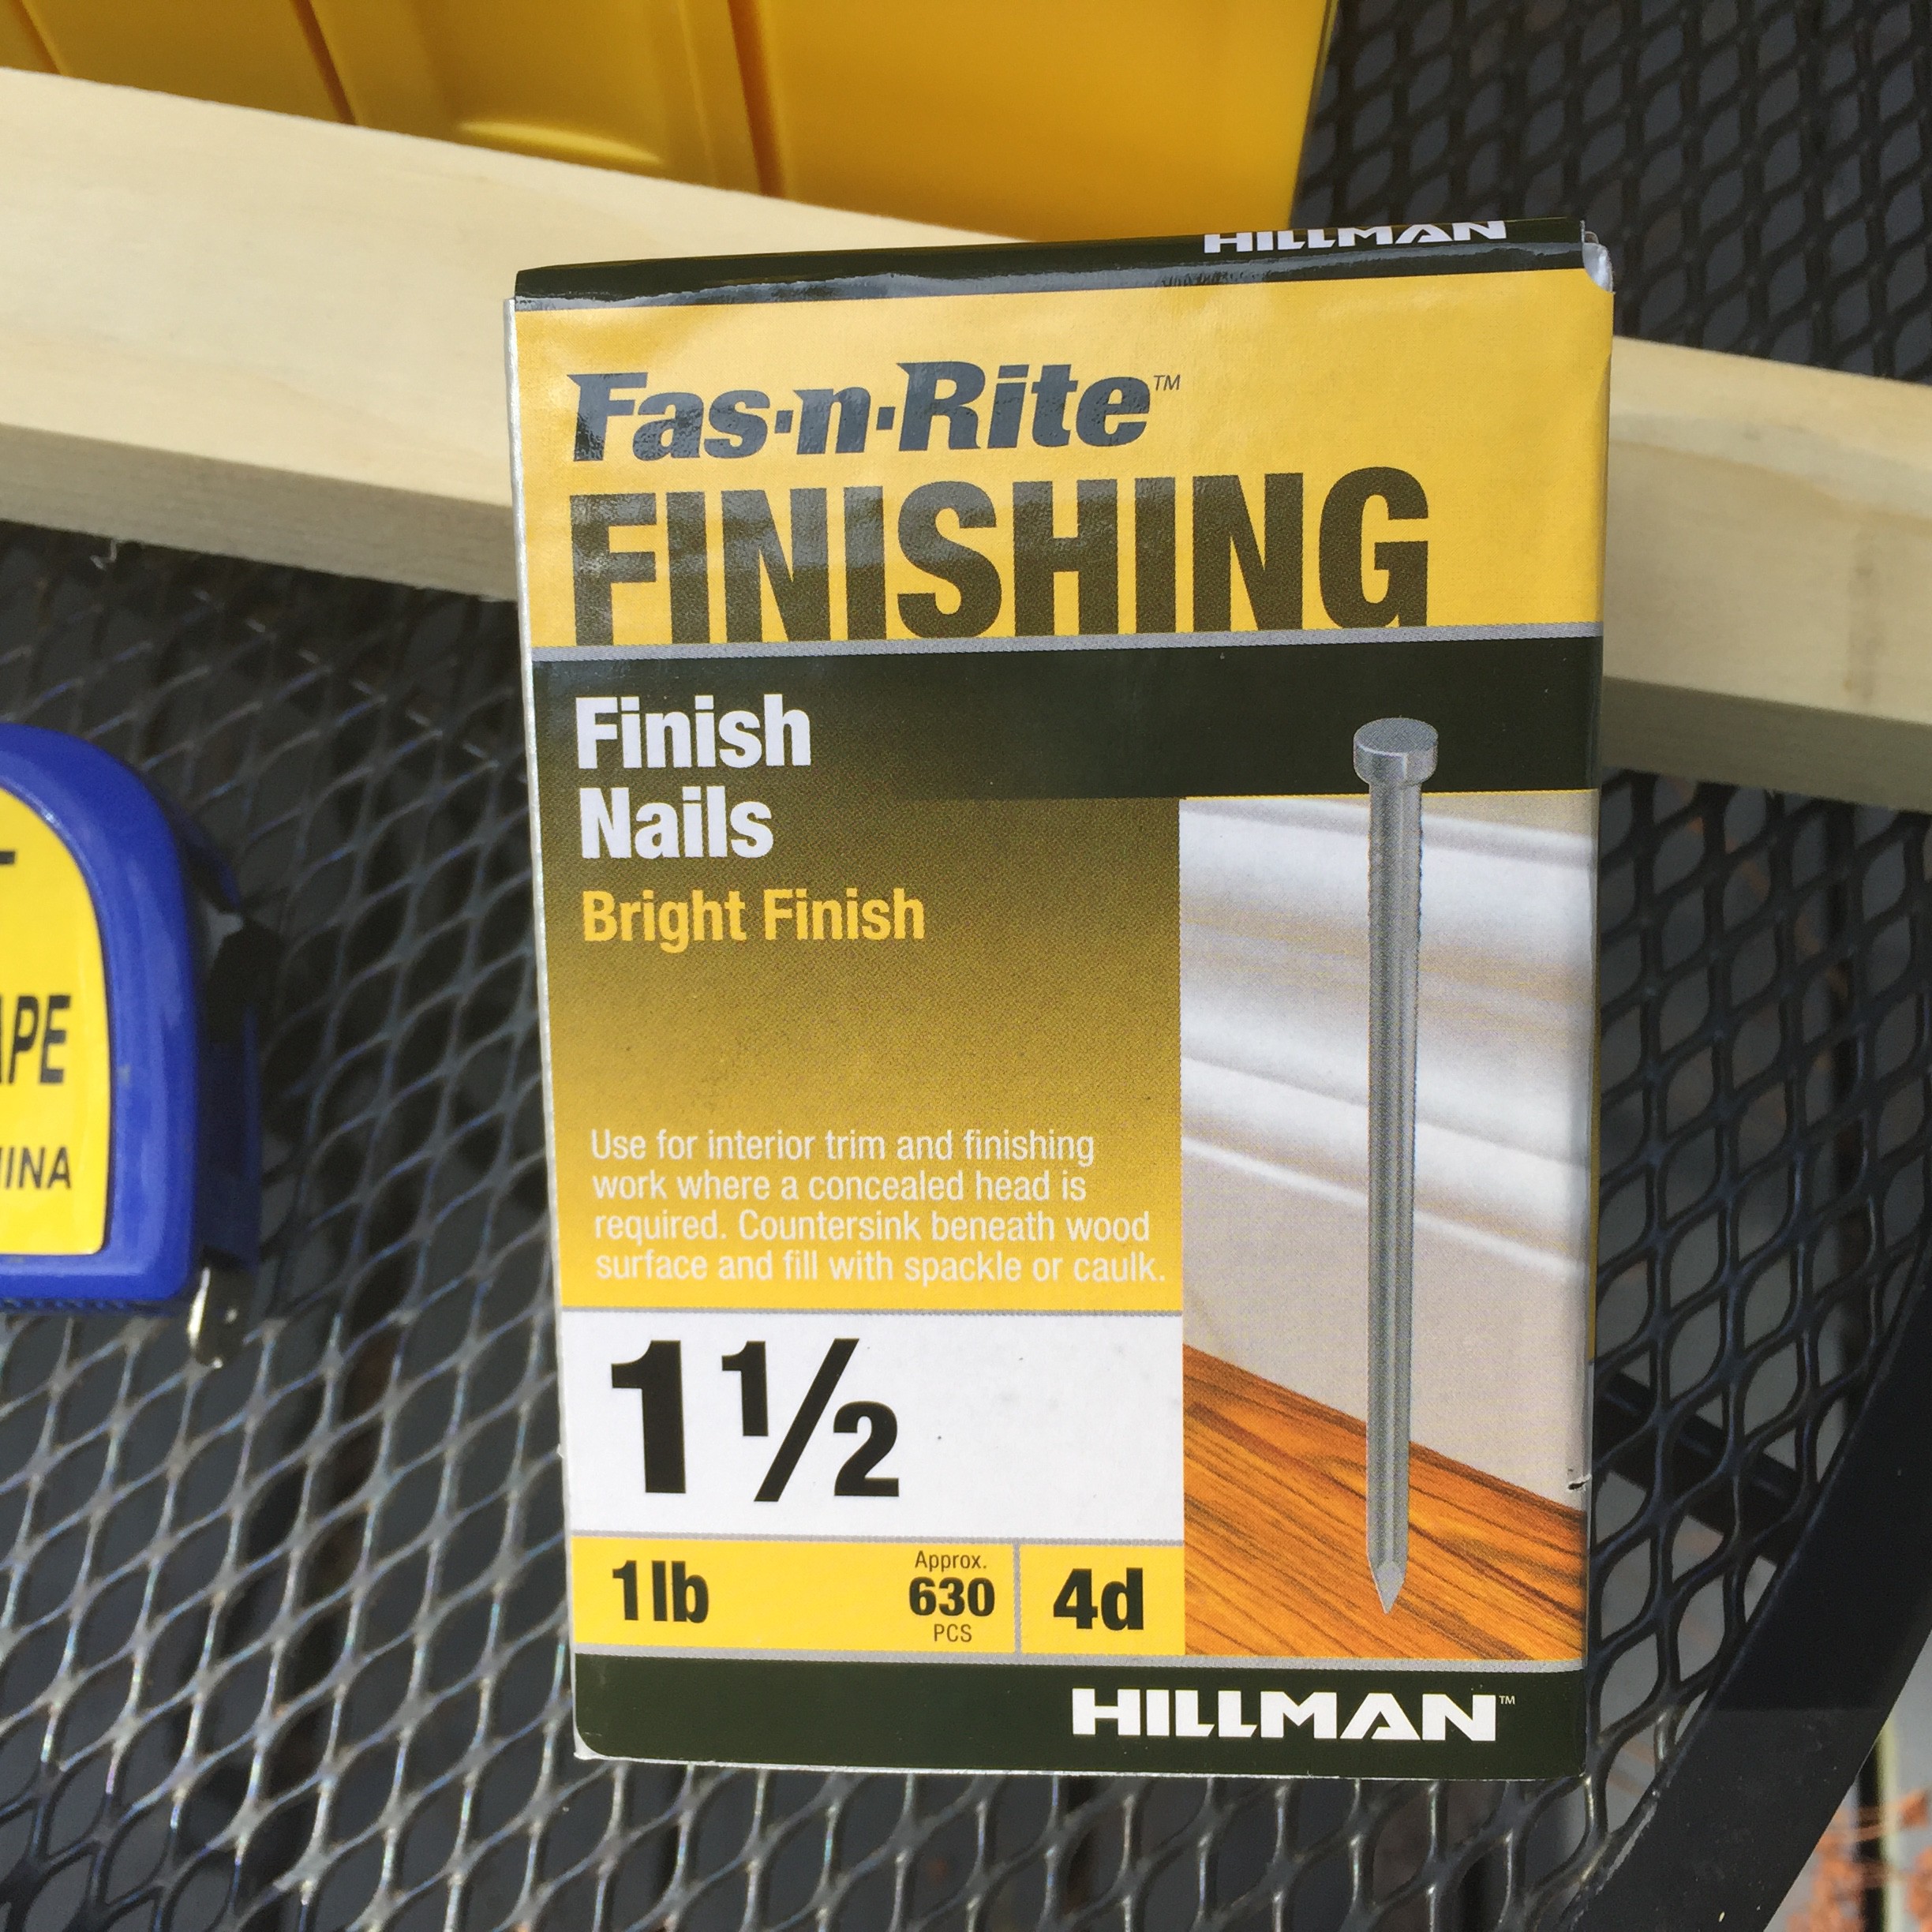
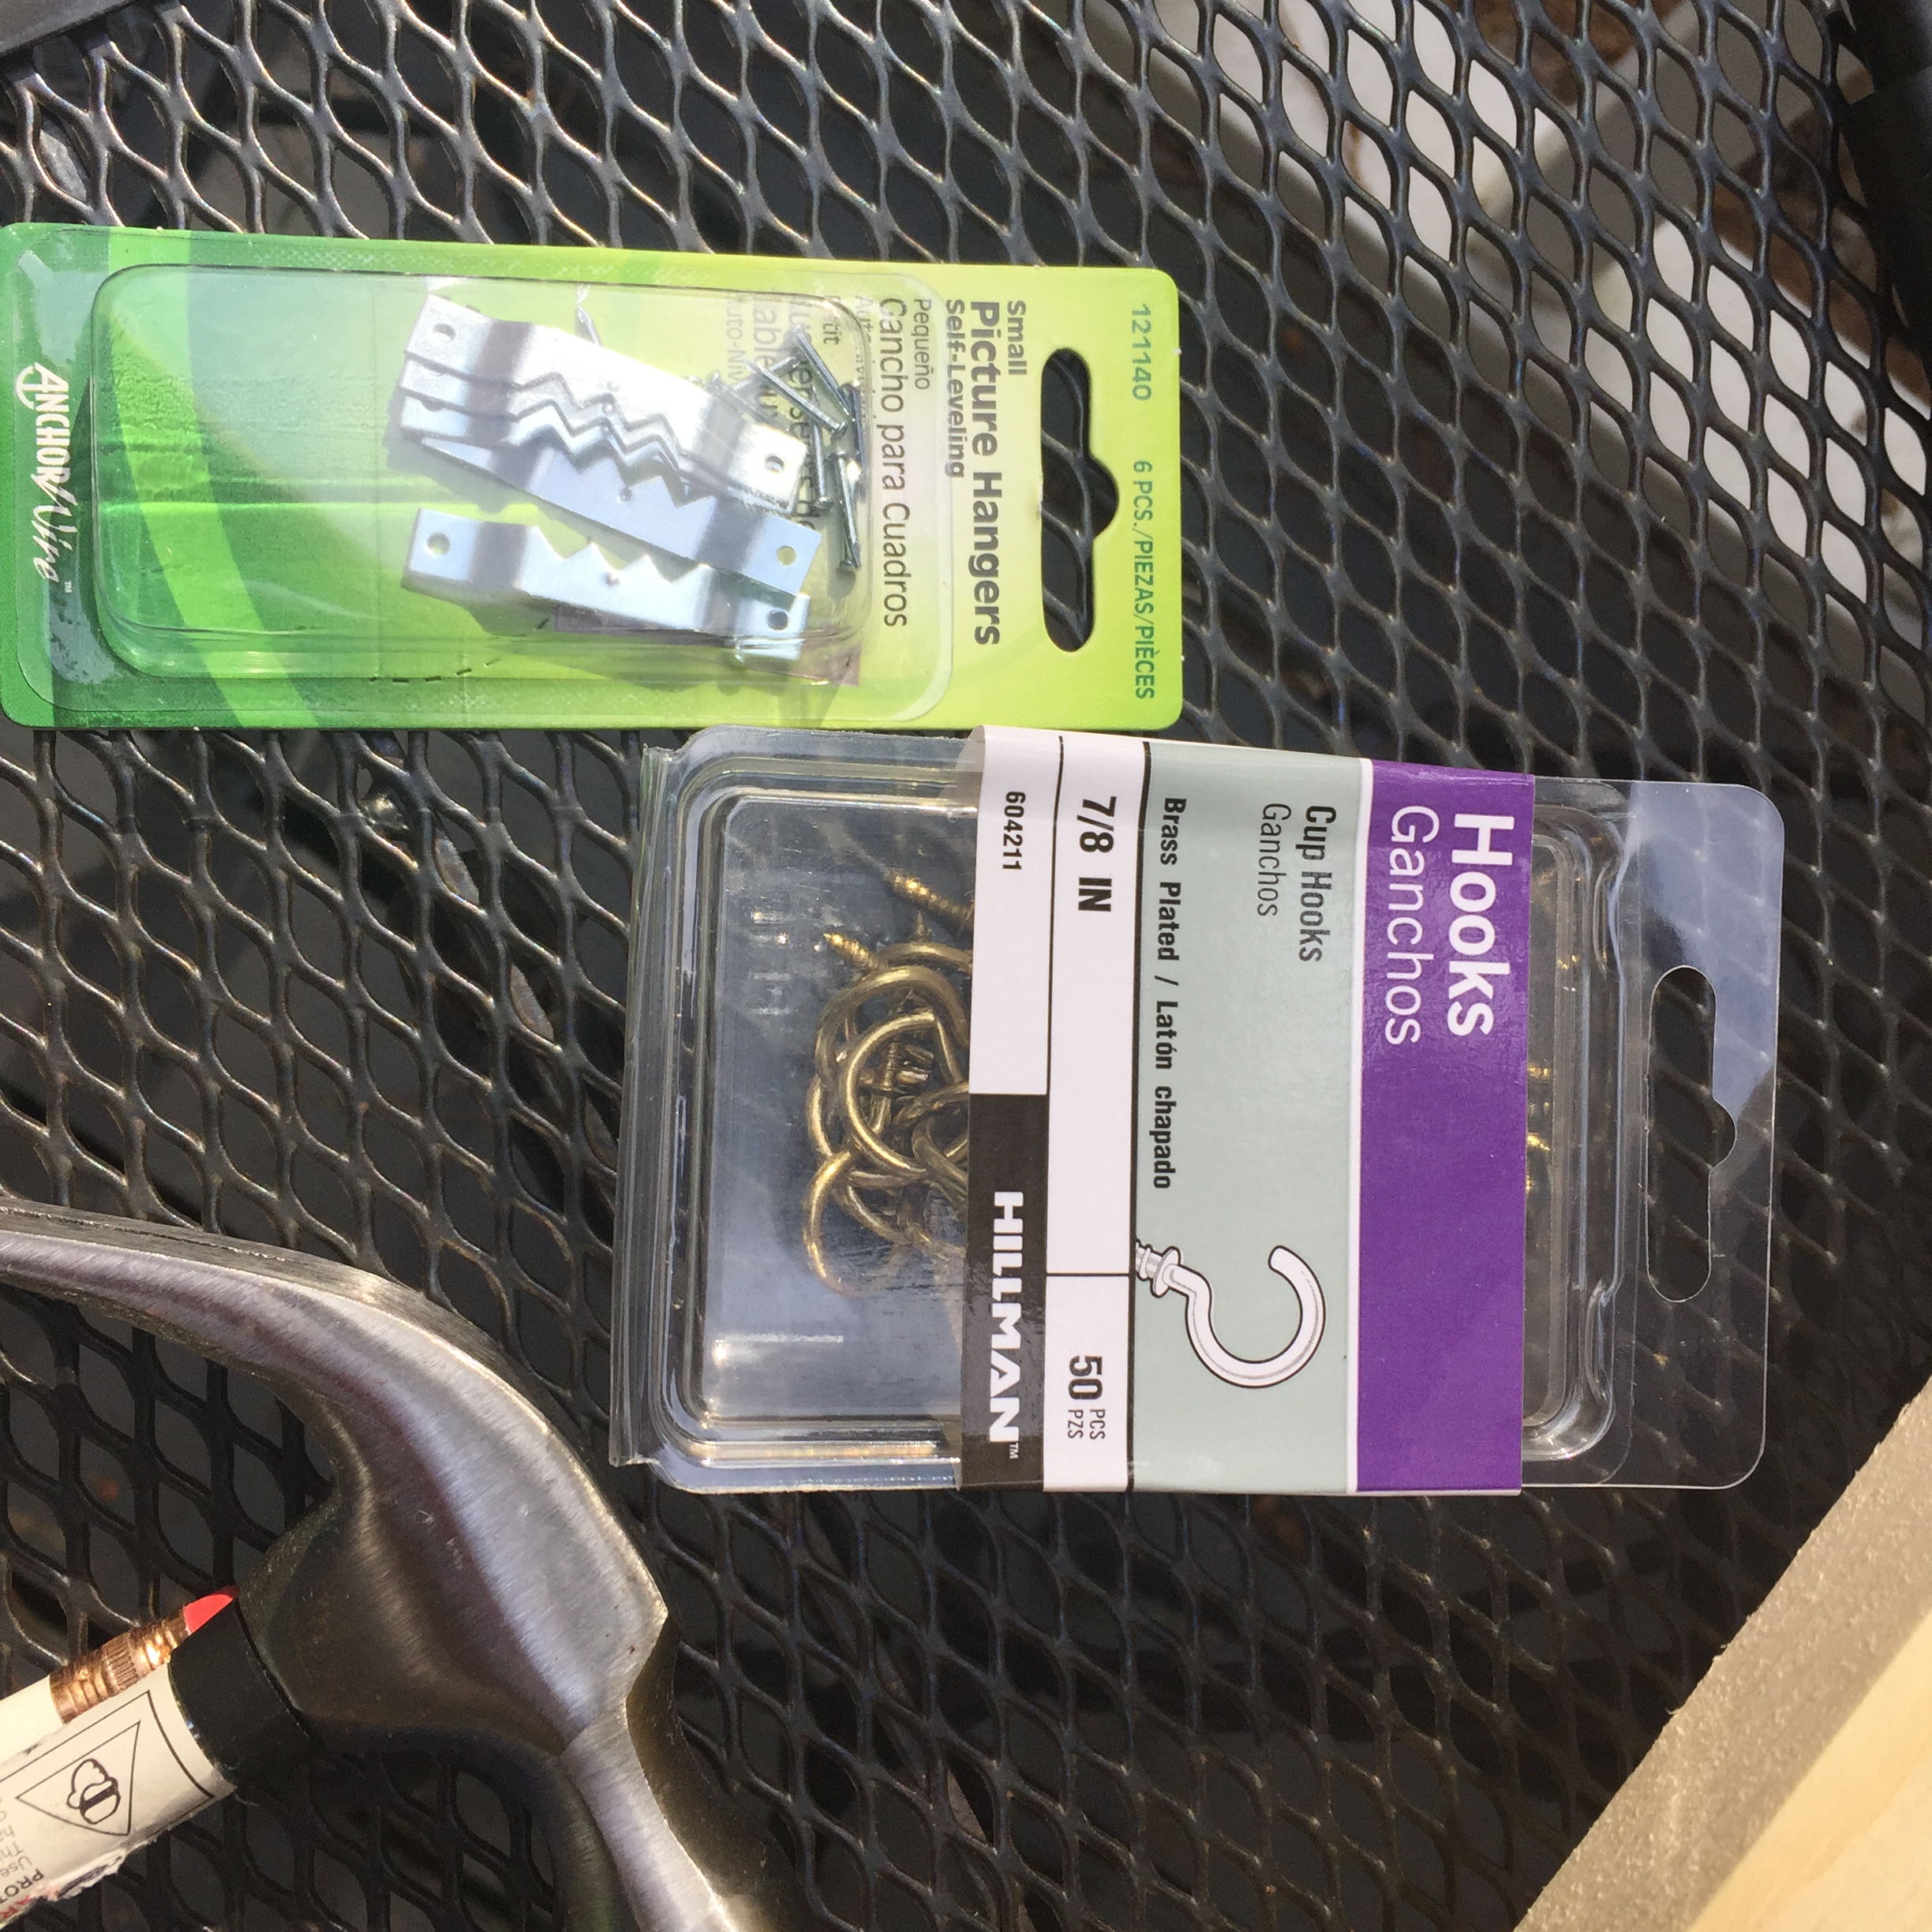
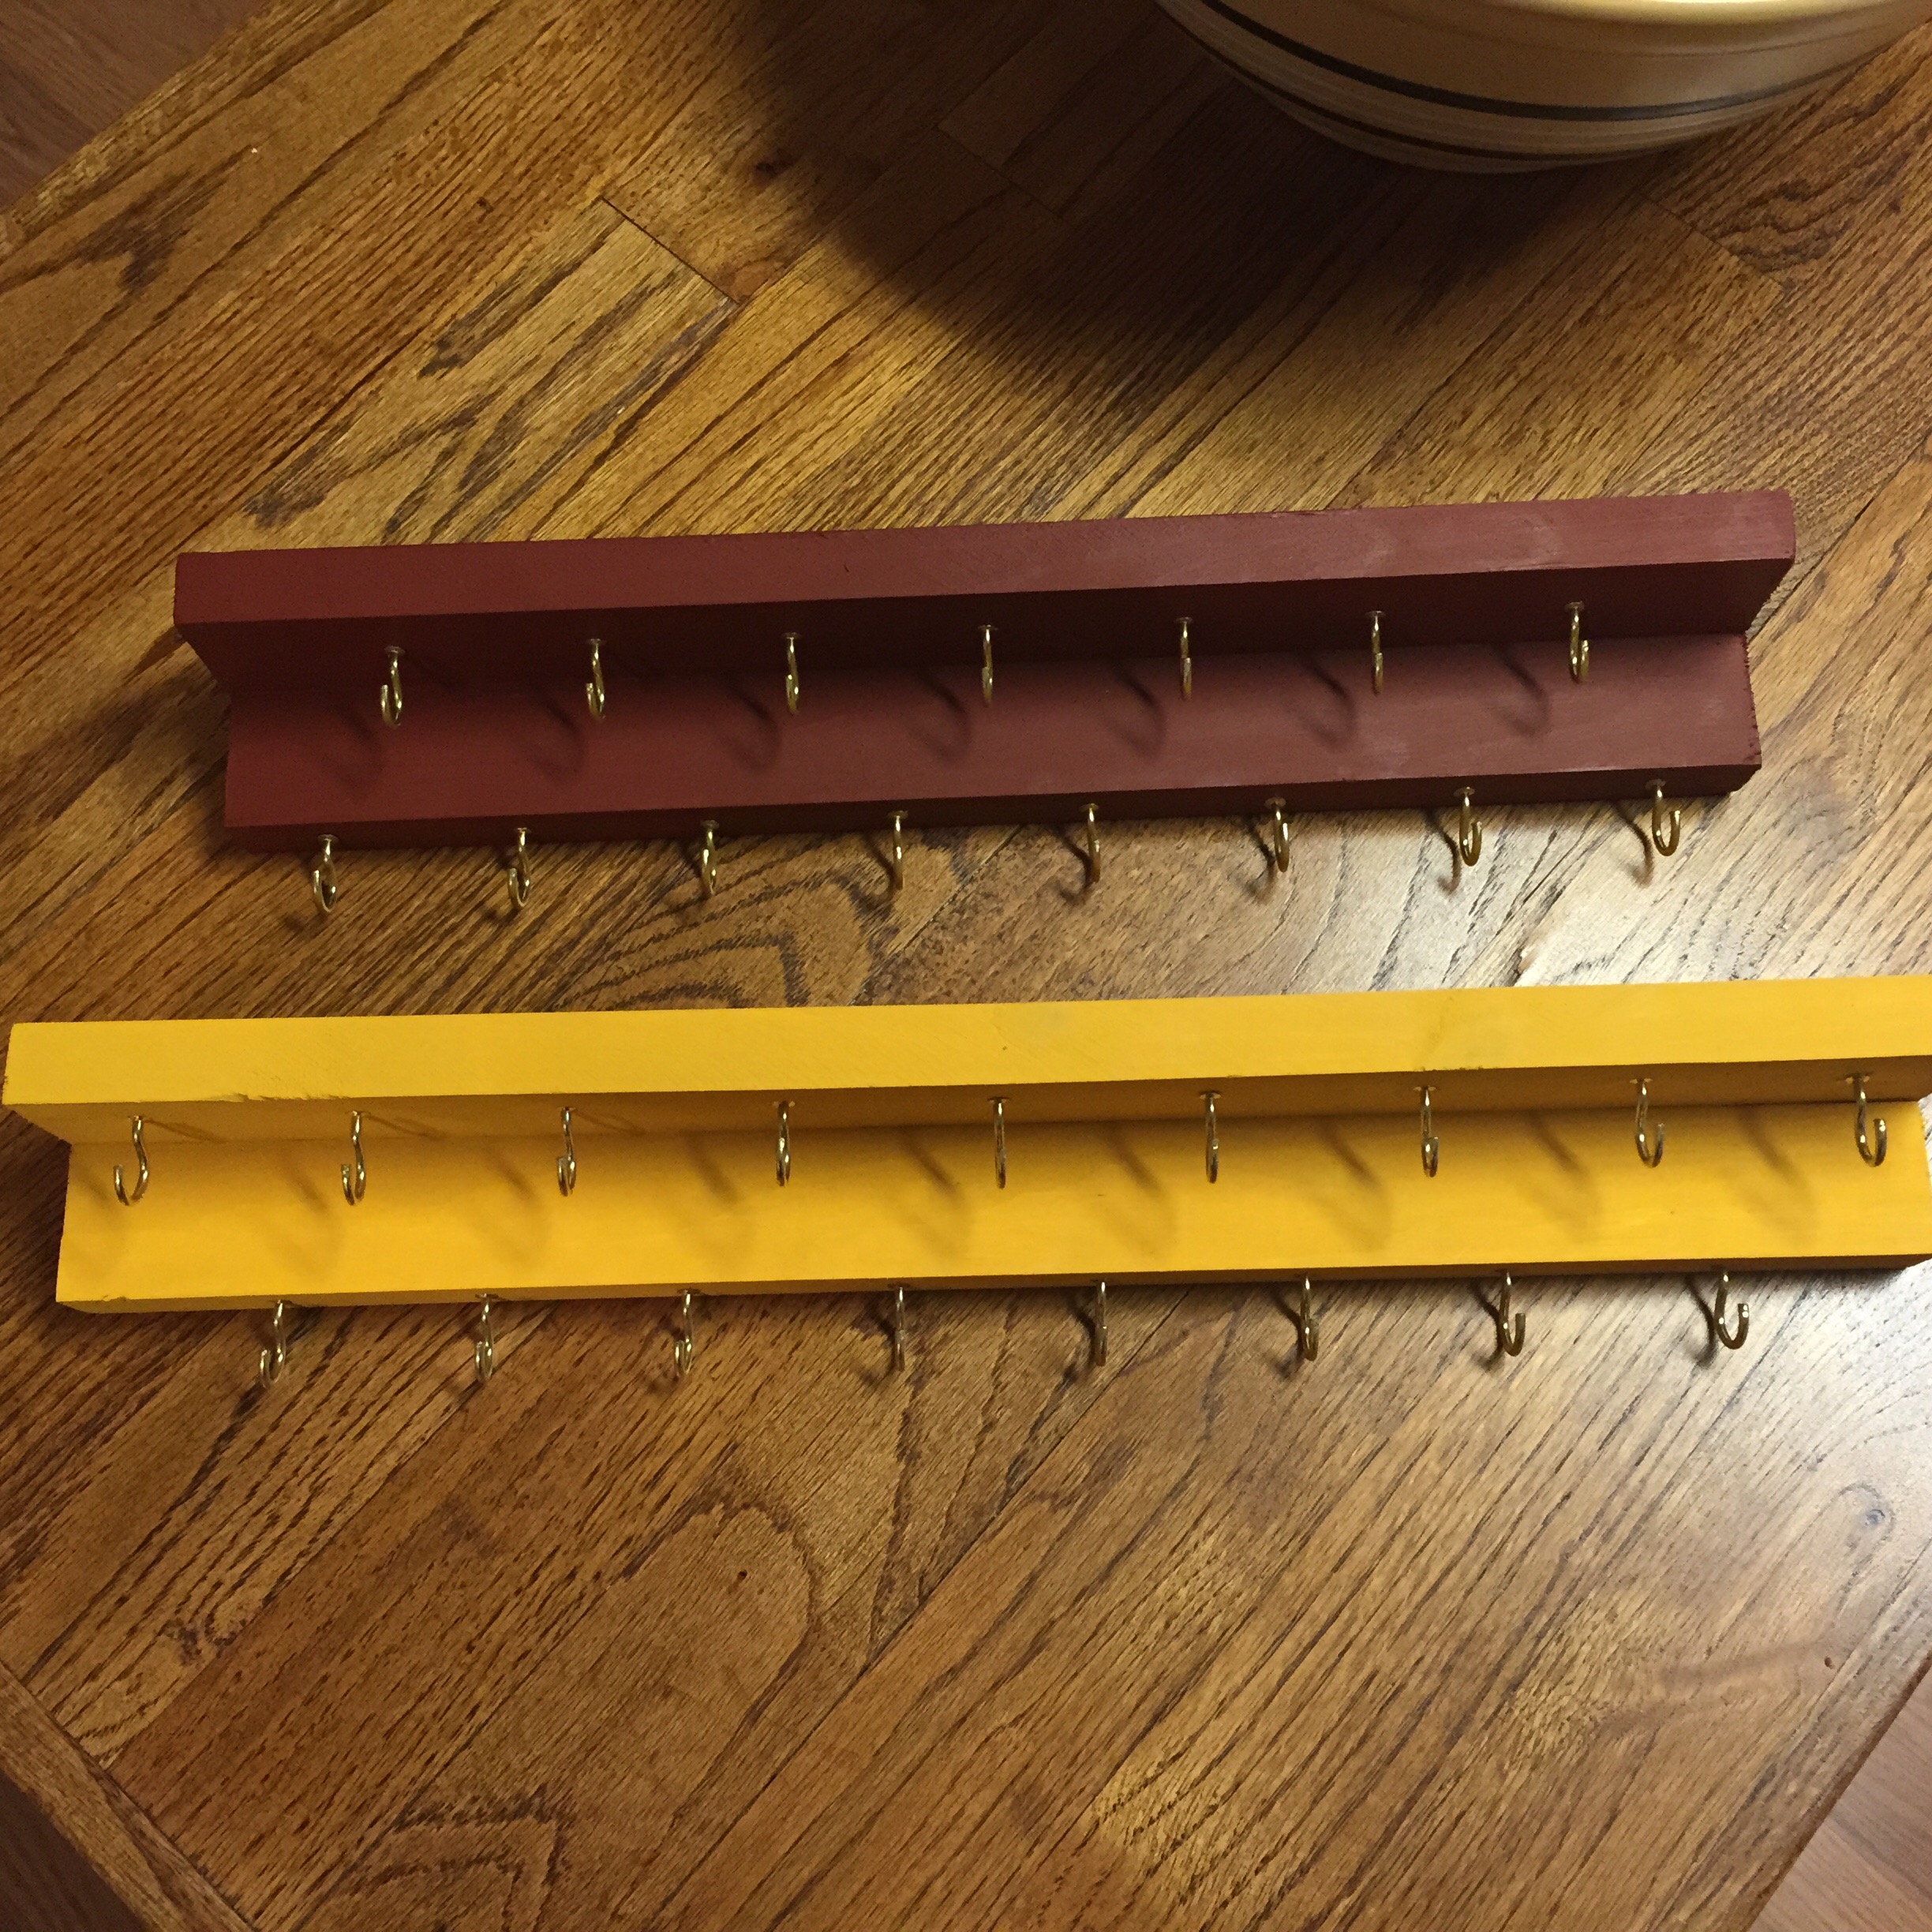
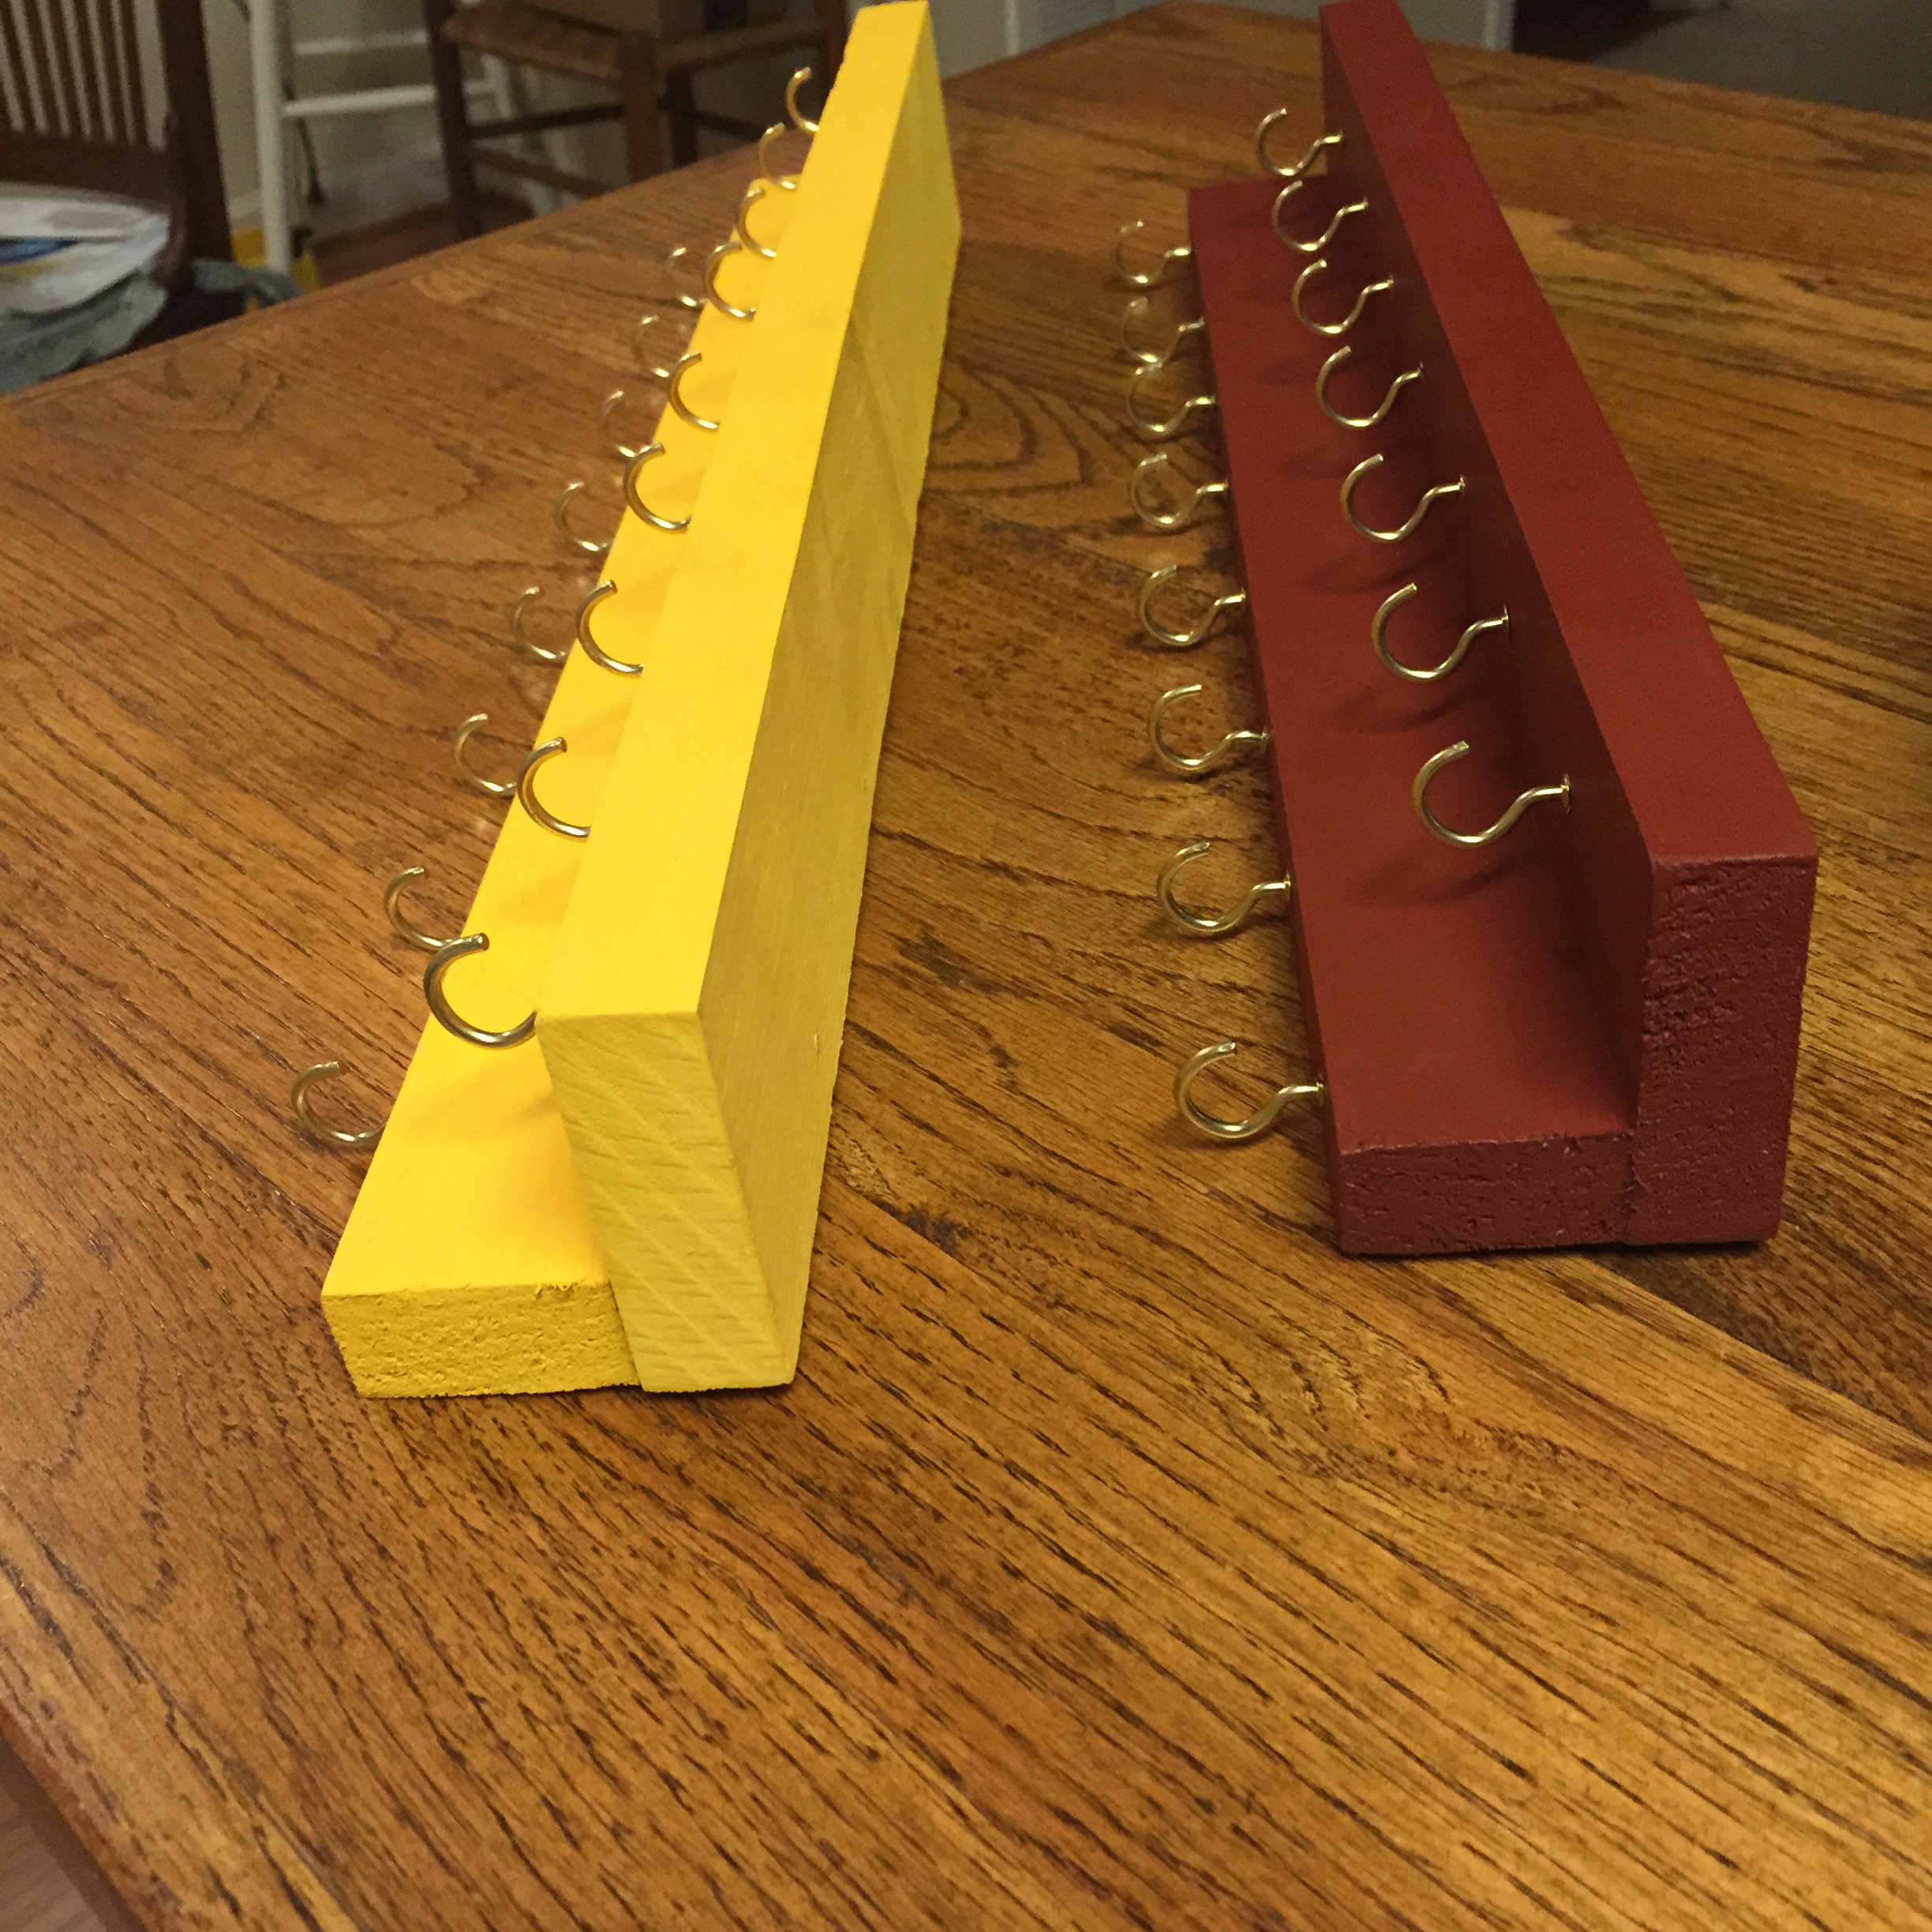
Figure out how long you want your necklace holder to be. I picked 18″ and then made a second one that is 16″. If you go with 16″, you’ll probably have enough wood to make four (hello, Christmas presents!). Measure twice to make sure, and then saw an 18″ piece from both pieces of wood. Line up your pieces so the 3×6 is on top and forms a shelf and hammer your nails into the top (I used four nails).
It’s now up to you on whether you add the picture hooks to the back or wait until after you’ve painted. I did the hooks first, but it was really difficult to paint the back, and I ended up getting paint all over the hooks. I used two hooks on the back so it would hang straight.
I sanded my necklace holder down a little bit just to get the ends a little softer, and then I added a few layers of paint using the sponge brushes. In southern North Carolina the heat outside had these guys dry in just a few minutes, which allowed me to paint one while the other dried, and then switch them out. On mine I used “Kings Gold” and for my sister’s I used “True Burgundy.” I really like the color of hers better, but I couldn’t steal it because it didn’t go with my bedroom colors 🙂
After it dries, you’ll need to decide how many hooks you want on the top and bottom. I wanted mine to alternate so the necklaces in the back could be seen. Using my tape measure, I marked spots every two inches then screwed in the hooks. I ended up with seventeen hooks on my holder. I think I should’ve used less space in between each one to really maximize the space.
I have a small wall right next to my closet that is the perfect spot for my necklace holder (no matter how many pictures I took, it looked crooked in every single one…maybe it really is crooked). Be sure to line it up straight, mark where the hooks are so you can place the nails in the right location, and voila! No more messy dresser!

Good luck with your own necklace holder! I’d love to see pictures of your projects!

